
Remote Access to your Office Computer
| These instructions are appropriate for users wishing to use Remote Desktop from a Windows machine. The steps are similar for users of other kinds of machines (e.g. Macs or iPads). If you need assistance help at wbs dot ac dot uk |
Scenario
You are a WBS staff member or PhD researcher with a second computer at home that uses Microsoft Windows. You would like to connect to your office computer to work as though you were sat at your work desk. Your office computer will be left powered on or you will be connecting to a virtual machine that is always running.
Explanation of Remote Desktop
Remote desktop allows you to connect to your office computer from a home computer. The office computer does all the work with the results showing on the home computer’s monitor. It is just as though you are sat in your office; you have access to all the same applications, all your drives (including your H drive and I drive) and to your printers.
Procedure
There are five stages to connecting to your office computer using Remote Desktop:
- Request access to the University's VPN (should only need doing once)
- Set up your office computer (should only need doing once)
- Set up the Campus VPN on your home computer (should only need doing once)
- Connect to the VPN from your home computer (needs doing each time you want to connect).
- Connect from your home computer (needs doing each time you want to connect).
Step 1: Request access to the University's VPN
From December 2022 access to the University's VPN is opt-in and must be requested. To do please complete this form. It will typically take about 1 day to have this request approved by the central University IT team.
When completing the form select 'Other' in answer to the question 'What do you require VPN for'. For students please provide details as to your need to use the VPN. For staff the following form of words is then recommended:
I work in WBS and have been advised by my local IT team to connect regularly to the VPN to ensure my computer is kept updated and secure.
Step 2: Setting up your office computer (should only need to be done once)
- Log into your office computer and enable Remote Desktop for your user account by running the ''Remote Desktop" application in Software Centre.
- On the resulting screen note the IP address as you will need this later (shown at 1 in the picture below). You should also see a list of users able to remote desktop to your machine (2), typically this will only show your username. If you share your computer with someone else you will both have to run this application once

Step 3 - Set up the Campus VPN software on your remote (home) computer
If your remote / home computer is provided by WBS this should likely already be done for you. To check please click the start button and type 'AnyConnect'. Provided it returns a result like that below then you are good to jump to step 4. If not please contact the WBS Helpdesk ( help@wbs.ac.uk ) for advice.
Step 4 - Connect to the VPN
You will not be able to complete this step, nor make a remote connection, until you have heard back positively regarding your request in Step 1.
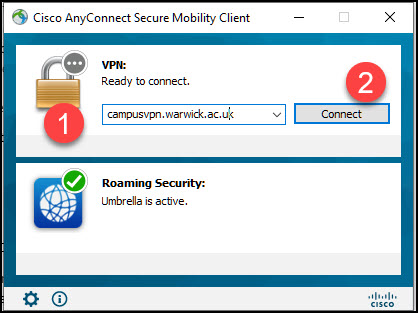
Once you have received confirmation that you have access to the VPN click the Start button on your computer and type AnyConnect. Click the option to start the Cisco AnyConnect client. Check the address is campusvpn.warwick.ac.uk (if not click cancel and edit it). Enter your IDG username (typically similar to u22111111) and password to connect.
Step 5: Start up the Remote Desktop software on your home computer
- Click the start button and type 'remote'. Click on the option for 'Remote Desktop Connection'.
- Click the Show options button
- Enter your computer's IP address (from step 1) or its full name (something like wbs001234.wbs.ac.uk). Enter your WBS username in the format wbsdom\username

- Click Connect
- Enter your WBS password when prompted
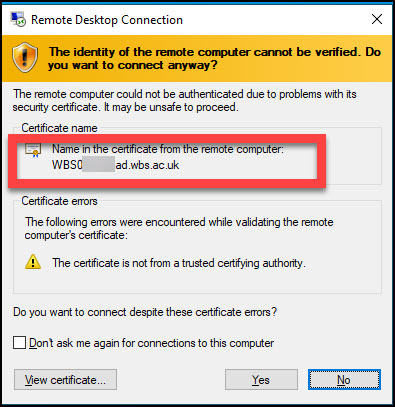
- If you see a warning like the following this can be safely ignored provided the name of the certificate matches your office computer. In that case click Yes
- You should now find you are connected to your office computer as though you were sat in front of it. To disconnect you typically click the x option in the top centre. Think carefully before shutting down (powering off) your office computer. If you do this you won't be able to connect to it again without contacting the WBS Helpdesk to ask them to turn it back on.
If you have any problems connecting please help at wbs dot ac dot uk