
Tables
Tables can be a useful way to display information for visitors to your page.
In this article:
Insert a table
-
Browse to the page where you want to add a table.
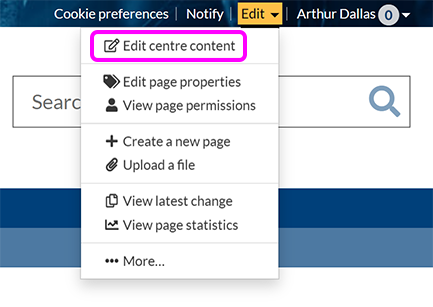
-
Go to Edit > Edit centre content:
-
Place your cursor where you want to add the table.
-
Select the New table button in the editor toolbar:

-
In the New table pop-up, select a cell to specify the number of rows and columns for your table:

-
An empty table of your selected size appears on the page:

-
See below for details of how to add rows and columns, remove rows and columns, merge and split cells, edit a table's properties or make a table sortable.
-
When you're finished editing your content, select Publish.
Add rows and columns
-
Select a table cell next to where you want to insert a new row or column. The table toolbar appears:

-
In the table toolbar, select the appropriate button:
-
Add row before: Add a new row above the current one.
-
Insert row after: Add a new row below the current one.
-
Insert column before: Add a new column to the left of the current one.
-
Insert column after: Add a new column to the right of the current one.
-
Remove rows and columns
-
Select a cell in the row or column you want to delete. The table toolbar appears:
-
Select the appropriate button in the table toolbar:
-
Delete row: Delete the current row.
-
Delete column: Delete the current column.
-
Merge cells
To combine multiple cells into a single cell spanning more than one column or row:
-
In the Components Editor, select and drag to highlight the cells you want to merge:

-
Select the Merge cells button.
-
The selected cells are merged into a single cell spanning the combined space:

Note: Any content in the selected cells will be combined in the merged cell.
Split merged cells
To separate a merged cell into its original individual cells:
-
In the Components Editor, select the merged cell:

-
Select the split cell button.
-
The merged cell is split back into the original number of separate cells:
Note: Any content that was contained in the merged cell is placed in the uppermost, leftmost cell after being split.
Edit a table's properties
-
Select a cell in the table to display the table toolbar:
-
Select the Edit table properties button to open the Table properties pop-up:

-
Select the checkboxes to define the appearance of your table:
-
Striped: Alternating rows have a light grey background.
-
Bordered: Each cell has a 1-pixel border.
-
Condensed: The space between rows is reduced.
-
Hoverable: Each row is highlighted as a visitor hovers over it.
-
-
To show a piece of text summarising your table directly above the first row, enter the text in the Caption box.
Tip: most screen readers announce the content of table captions, which can help someone determine what the table is about and whether they want to read it.
-
If the first row of your table contains column headings, select the Format top row as header checkbox.
-
Select Update table.
Make a table sortable
When the first row of your table contains column headings, you can choose to make the table sortable:
-
Select a cell in the table to display the table toolbar:
-
Select the Make table sortable button to open the Make table sortable pop-up:

-
Select the checkbox for each column you want to allow visitors to sort the table by. Alternatively, you can Select all columns, or Select none.
Note: If the table has not been set to Format top row as header, enabling sorting will automatically assign the top row as a header row.
- Select Update table. Your table is now sortable by the selected columns. For example, the table below is sortable by all columns:
| First name | Surname | University ID |
|---|---|---|
| Rebecca | Jorden | 4400086 |
| Dennis | Parker | 4400066 |
| Joan | Lambert | 4400081 |
| Samuel | Brett | 4400072 |
| Thomas | Kane | 4400082 |