
Reading Lists guides
Guides
These video and text guides are here to help you to create and make the most of your Talis Aspire reading list – from getting to know the system and creating your list, through making changes and updates, to publishing your list.
Our videos all contain subtitles, and full transcripts can be accessed by clicking through to YouTube. Our text guides are under the expandable headings, and contain illustrative screenshots.
Get started
Find out how to create your own Reading List profile and install the bookmark button on your browser ready to start saving items.
Hello. This video will show what you need to do when you first visit TALIS Aspire, as well as give a short tour of the TALIS homepage.
We recommend using Firefox or Google Chrome to work on reading lists. In this video, I'll be demonstrating using Google Chrome.
You can access TALIS Aspire through the reading list link, on the library homepage, or by going to readinglists.warwick.ac.uk.
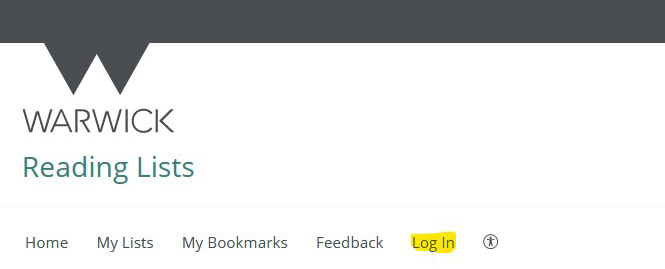
The first time you use TALIS Aspire you'll need to set up a profile. To do this, first click the "Log In" link and log in using your normal Warwick login.
In order to create an account for TALIS Aspire firstly go to "Create a Profile" and click the first option. From here, it will ask for your details. Please use your Warwick email details to fill this in.
As you will see here, there is an option to describe yourself, so please choose the relevant category. Finally, when you are done, click "Save profile". From there, your account should be fully created.
Once you've created your profile, you will need to install the bookmark button. Click the "My bookmarks" link on the Reading Lists homepage. Then, click the "Install bookmark" button and then click "Next". Click and drag the "Add to my bookmarks" link to your bookmarks bar.
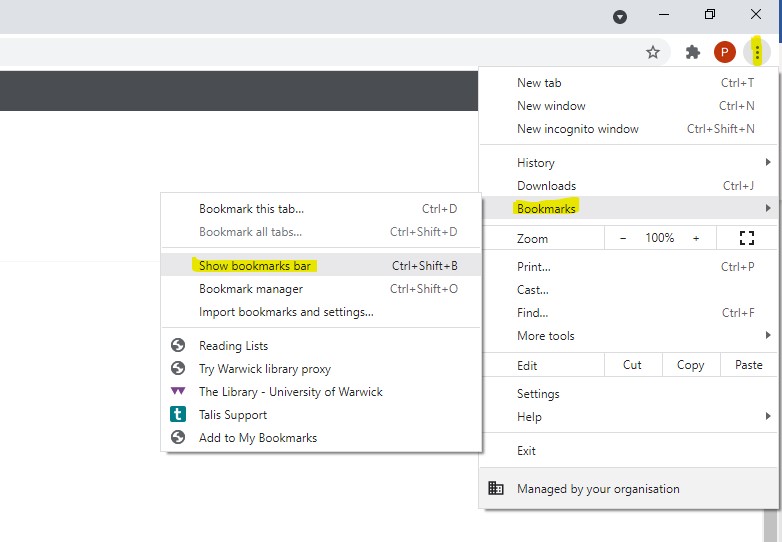
If you do not have a bookmarks bar, click on the three dots to the right of your address bar hover over "Bookmarks" and select "Show bookmarks bar".
To manually add the bookmark, right-click on "Add to my bookmarks" and select "Copy link address". The exact terminology for that might differ, depending on your browser. Right-click on your bookmarks toolbar and click "Add page". Again, your terminology might differ. Paste the link into the URL or location bar and set the name to "Add to my bookmarks" and click "Save".
If you have any problems, you can click the "Visit support link" or contact the Reading Lists Team at ReadingLists dot Library at warwick dot ac dot uk
That's everything you need to do on your first visit. I will now give a quick tour of the TALIS pages.
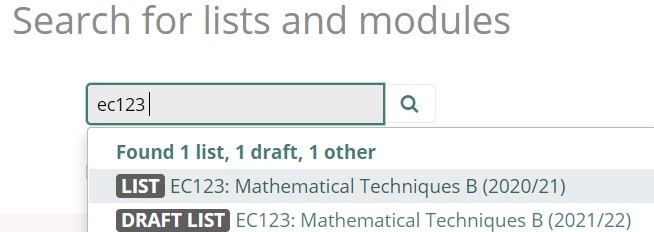
The TALIS homepage allows you to search for lists. When you search, the results will show both lists and modules, so make sure you always click the link labeled "LIST", and check that the year, at the end of the link, is correct.
The homepage also contains recent updates from the library Reading Lists Team.
You can view your profile by clicking your name and then clicking "View profile".
You should check that your information is accurate and you can edit it using the "Edit profile" button. Further account information is available under the tabs.
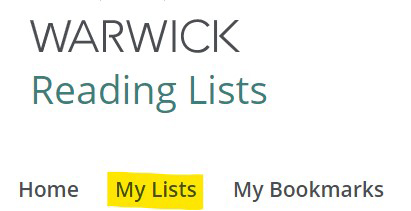
"My lists" shows all the lists you have added to "My lists".
This can include lists you've created, lists you've been assigned by the Reading Lists Team, and lists you have chosen to watch using the "Add to my list button" at the top of each reading list.
"My bookmarks" shows all of the bookmarks you've have added, using the bookmarking tool.
"Feedback" allows you to give feedback on TALIS and the Reading Lists service. You can also offer feedback and request further support by contacting the Reading Lists Team at ReadingLists dot Library at warwick dot ac dot uk
Thank you for watching!
This guide will take you through setting up your profile, adding the bookmarking tool to your browser, and will give a short guide to the different areas of Talis Aspire.
Log in and set up a profile
You will need to log in to Talis Aspire Reading Lists in order to set up a profile.
- Go to Reading Lists and Log in using your Warwick username and password
- Your profile will be automatically created by Talis. You will now have editing rights for your module reading lists
- You can check that your details are accurate by clicking on your name, and then clicking ‘View Profile'
Installing the bookmark button
In order to create and edit reading lists you will need to install the reading list bookmark button on your browser. This will allow you to collect and save any bookmarked items within your My Bookmarks area, e.g. books, eBooks, articles, etc.
- Check that your bookmarks bar is showing in your chosen browser. We recommend using either Firefox or Google Chrome to edit your reading lists
- Chrome: Click on the three dots in the top-right of your browser. Hover over Bookmarks and then click ‘Show Bookmarks Bar’
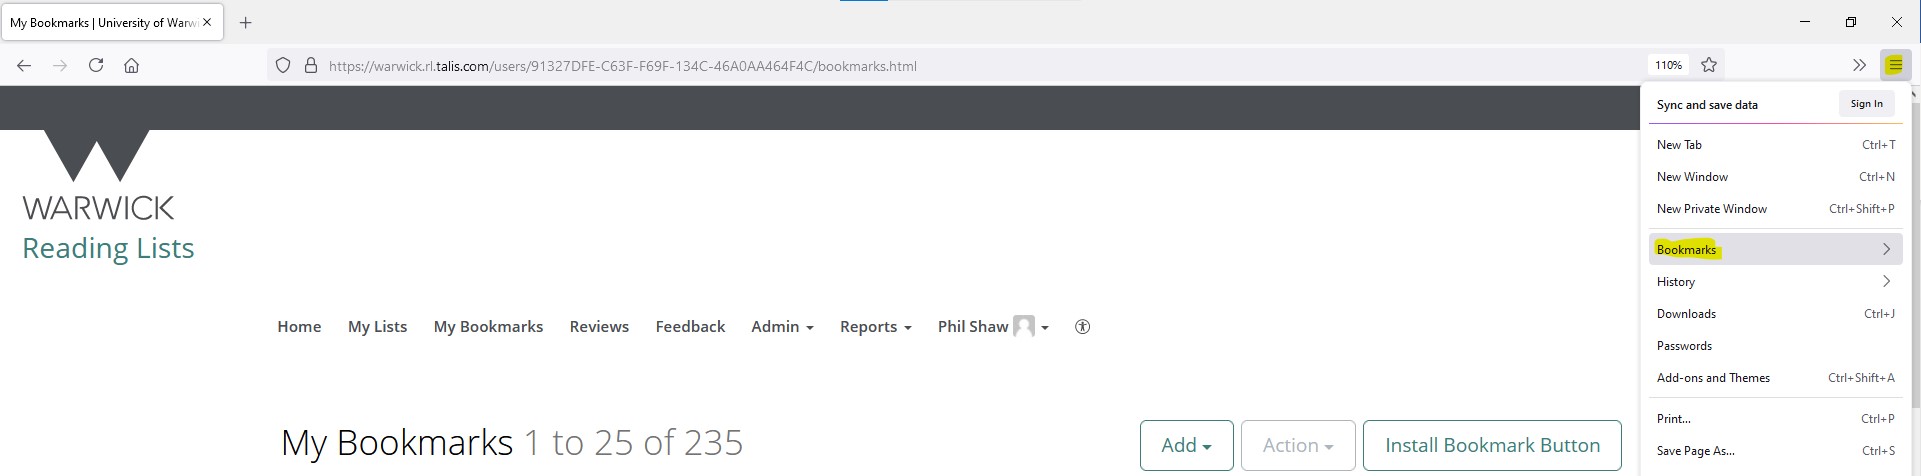
- Firefox: Click on the three horizontal bars in the top right of your browser. Click ‘Bookmarks’, and select ‘Show Bookmarks Toolbar’ from near the top of the menu

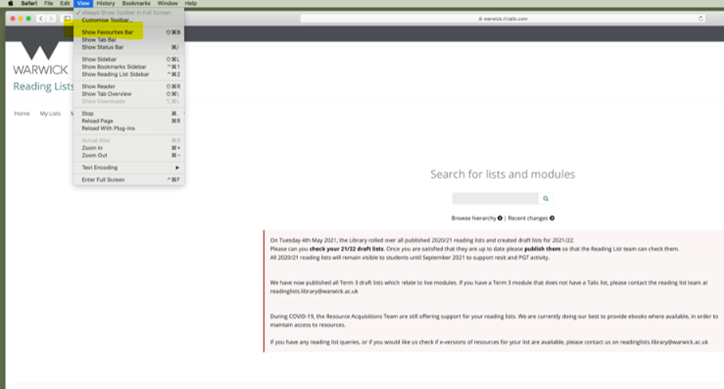
- Safari: Go to ‘Bookmarks’ and select ‘Show Bookmarks’
- Chrome: Click on the three dots in the top-right of your browser. Hover over Bookmarks and then click ‘Show Bookmarks Bar’
- From the Talis Aspire menu bar click on My Bookmarks. Click on the link for the Install Bookmark Button on the right hand side of the screen, then click ‘Next’.
- Click and drag the Add to My Bookmarks button to your bookmarks bar. With the button installed you are now ready to start bookmarking items that you can add to your reading lists.

Guide to Talis website
Talis homepage
The Talis Homepage allows you to search for lists. When you search, the results will show both lists and modules, so make sure you click on the correct one. Module pages will contain links to every list that has been attached to that module.
The home page also contains recent updates from the library reading lists team.
Profile
You can view your profile by clicking your name, and then clicking 'View Profile'. You should check that your information is accurate, and can edit it using the ‘Edit Profile’ button.
Further account information is available under the tabs, including all the lists that you own under ‘Lists owned by me’.
My lists
My Lists shows all the lists you have added to my lists.
This includes lists you have created, lists you have been assigned by the reading list team, and lists you have chosen to watch using the ‘Add to my lists’ button at the top of each reading list.
My bookmarks
My Bookmarks shows all of the bookmarks you have created using the bookmarking tool.
Feedback
Feedback allows you to give feedback on Talis and the reading list service.
Help and advice
If you need further help with Talis Aspire Reading Lists or wish to arrange a training session for staff in your department please contact your Academic Support Librarian, or email readinglists dot library at warwick dot ac dot uk To request this guide in an alternative format please also email us.
Set up
Understand how to find your module and create your desired reading list structure.
Hello! In this video, I'll be demonstrating how to find a Talis Aspire reading list and how to create a new list.
First of all, from the Talis home page, click "Log in" and sign in using your normal Warwick login.
In the search box, start typing the module code or part of the title. Make sure that you click the link labelled "list", rather than the link labelled "module". To assign the list to yourself, click "Edit" then "Assign list owner". Click in the text box and either start typing your name or click "Assign to me". Click "Save with list publisher role".
You aren't able to add more than one owner but, if you're co-convening the course or otherwise sharing ownership of the list, you can still allow students to find the list by searching for any of your names. To do that, click "Edit" and select "Edit details" and then add all of the list owner's names into the "Description" section. Click "Save".
To check that the list is linked to the correct module, click "Edit" and select "Hierarchy and student numbers" from the drop-down. In the text box, start typing the module name or code. if the student number box is empty or inaccurate, enter the estimated number of students who will be taking the module.
If you can't find your module by searching, the Reading Lists Team will be able to set the module when they check your list. Please set the estimated student numbers even if you can't find the module.
If there's no list available when you search for it, you'll need to create a new list. To do that, go to "My lists" and click "Create new list". In the "List name" box, enter the module code, followed by a colon, followed by the module title.
In the "Description" box, type any details useful to the students, regarding the module or the list. It's also a good idea to enter the name of any academics who will be running the module.
To assign the list to the right module, click "Select Hierarchy". In the text box, type the module name or code. Enter the estimated number of students who will be taking the module. This can be changed later using the "Edit" menu.
As before, if you can't assign the correct module, leave it blank and the Reading Lists Team will be able to set the module when they check your list. Use the drop-down menu to set the Academic Year to the relevant year for your list. Now click "Save".
Once you've created your list, you'll be prompted to assign a list owner. If you're the module convener, click "I am list owner". Otherwise, click "Decide Later". Click "Save draft" to finish creating your list.
Thank you for watching.
This guide will show you how to find your reading list, how to structure the sections within the reading list, how to add paragraphs as well as different examples of how to structure the list.
Find your reading lists on Talis Aspire
- Log in to Reading Lists and search for your module list. This is usually easiest by module code (eg. EC123).

- You can also click Browse hierarchy to see the list of modules for a specific department. If you cannot find your module, please contact your Academic Support Librarian or email readinglists dot library at warwick dot ac dot uk
- Once you have located the list, click on the desired title and academic year to view the list.
- Click the Add to My Lists button on the top right of the screen.

- This will save the list to My Lists on your profile, ready for you to start editing.
If you are not listed as the list owner of the reading list, please contact your Academic Support Librarian or email readinglist dot library at warwick dot ac dot uk
Add a section to your Reading List
Talis Aspire allows you to split your list into sections. This is especially useful if it is a long list or you wish to break it up by week, topic or importance. Arranging your list in this way also creates a content page that students can use to navigate between the sections. We recommend you add sections before you start adding your bookmarks.
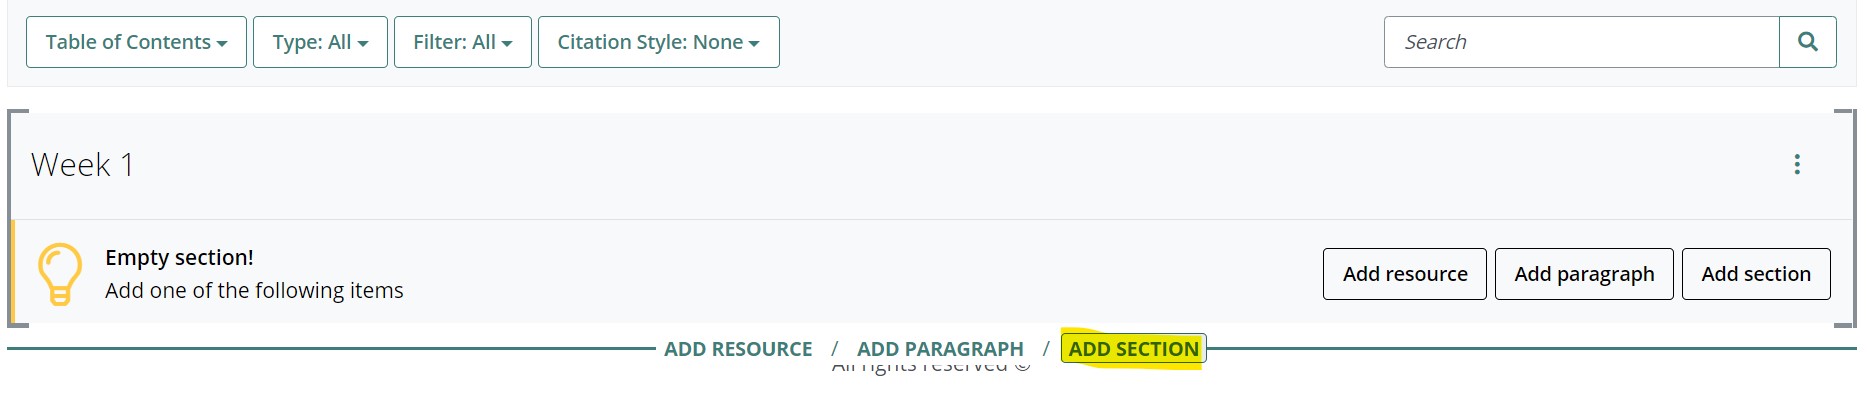
- To add a section on your empty list, go to the right of the page, and click Add Section.

- Fill in the title of the section and add a description of the section, if you wish, then please Save. (Please see additional ways of structuring your list on step 5.)

- To add the next section to your list, hover the cursor under the first section. Three options will appear, please click Add section.
- If you wish to add a section within a section, hover the cursor on the bottom line of your existing section. On the left side you can see where you are about to add another section (eg. Week 2). Please click Add section.
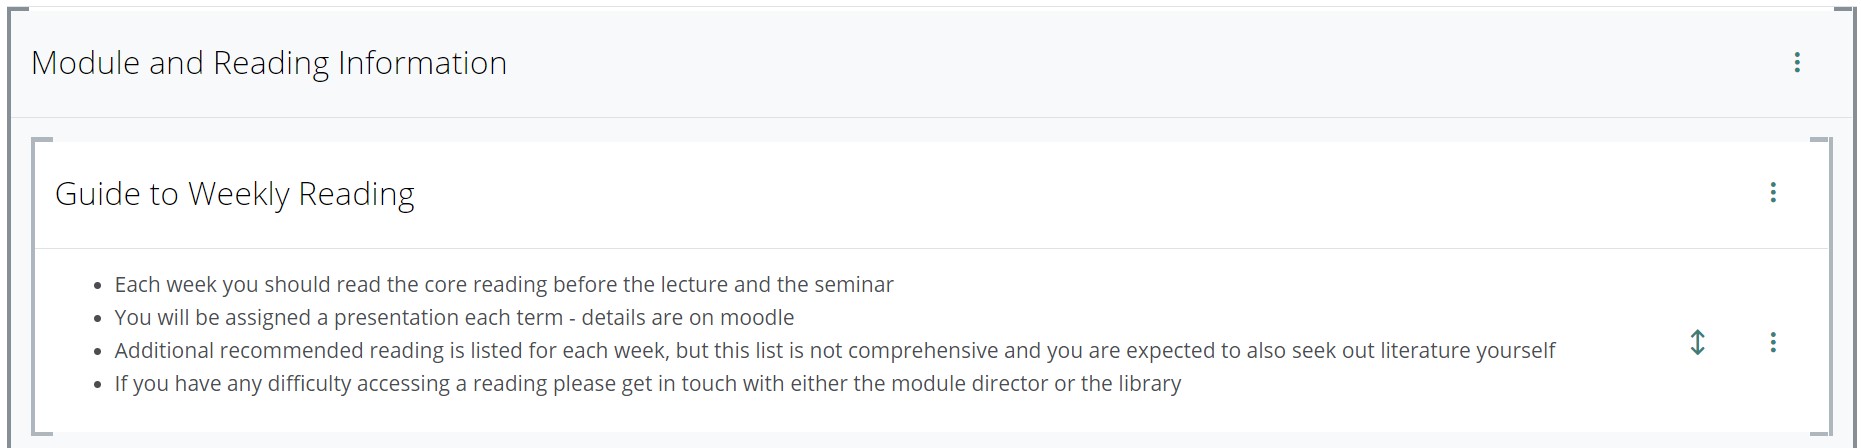
Add a title (and a description if you wish) and the subsection will be displayed like this:
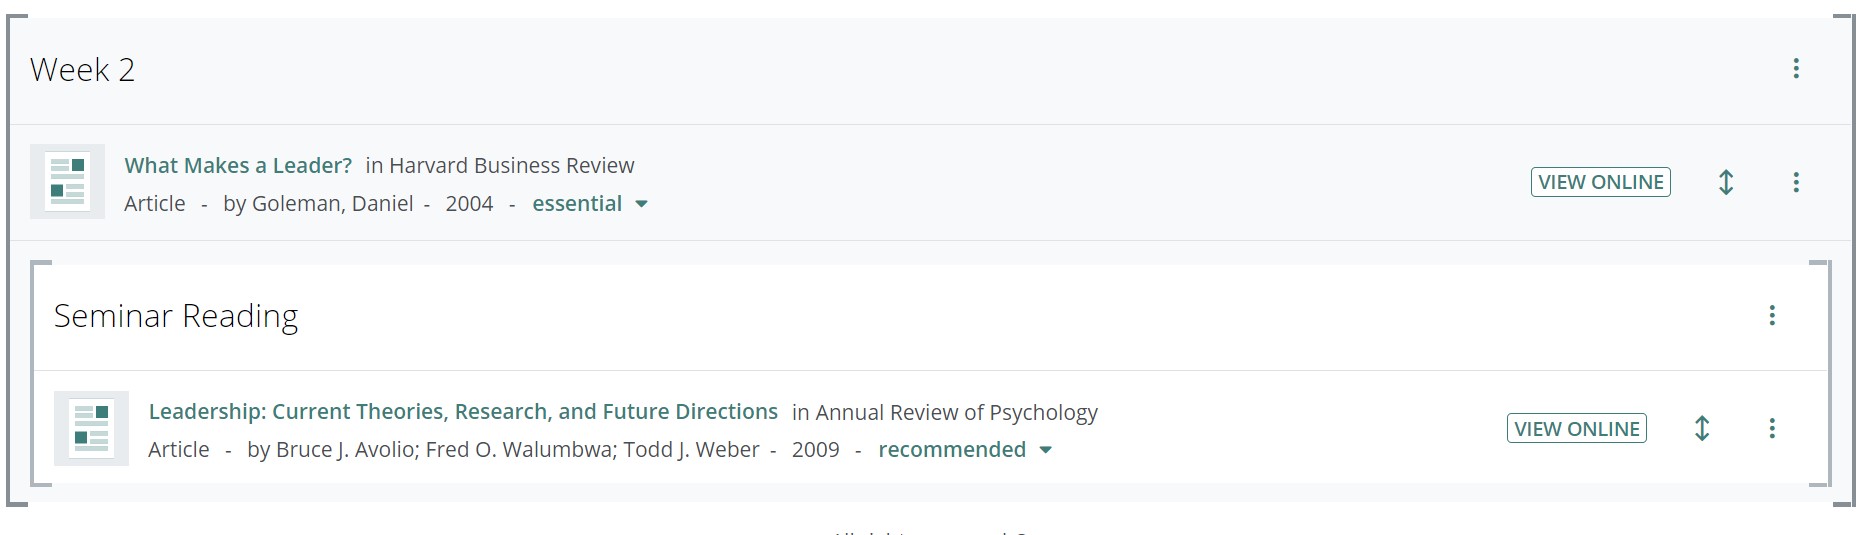
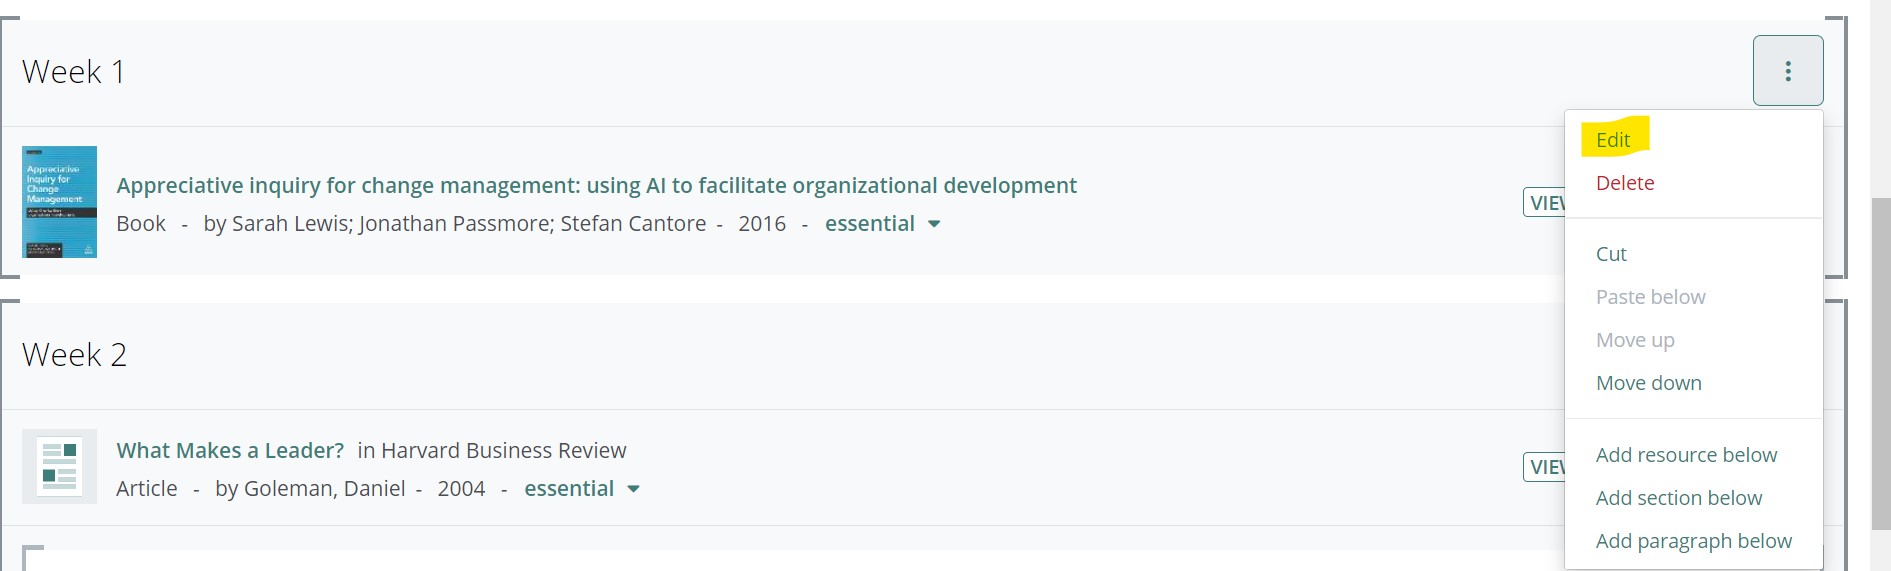
- Using different sections for your reading list, you can structure your list by weeks (as the examples above), by theme, or by importance (please see examples below). If you wish to change the title or edit your section description, go to the right side of the section title, then click Edit. You can also cut, paste, or move up or down the section, from the same menu.
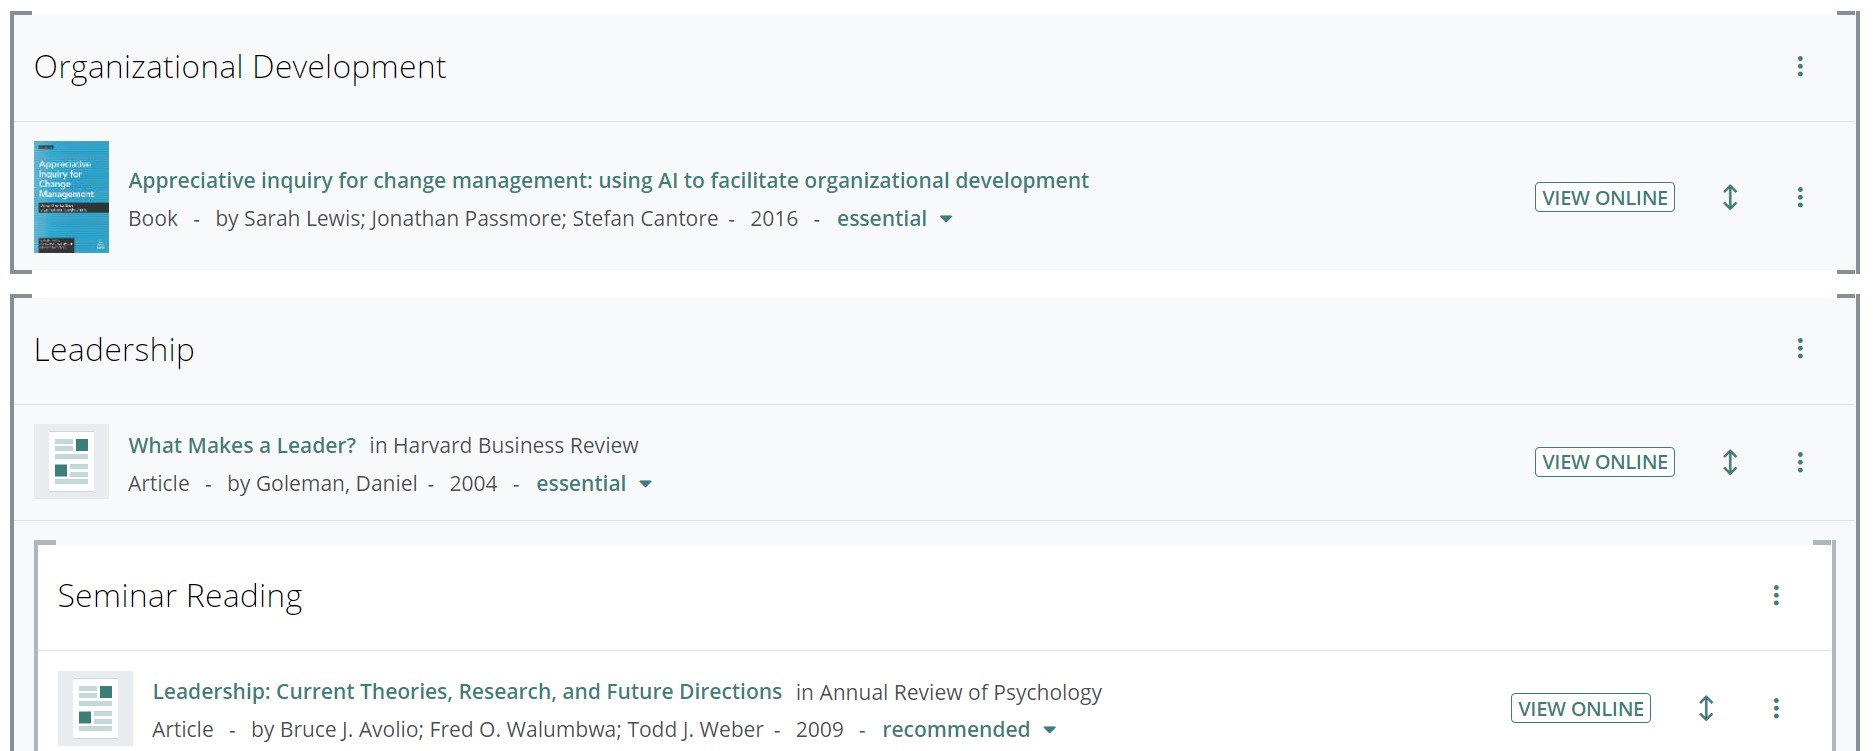
Example of list structured by theme:
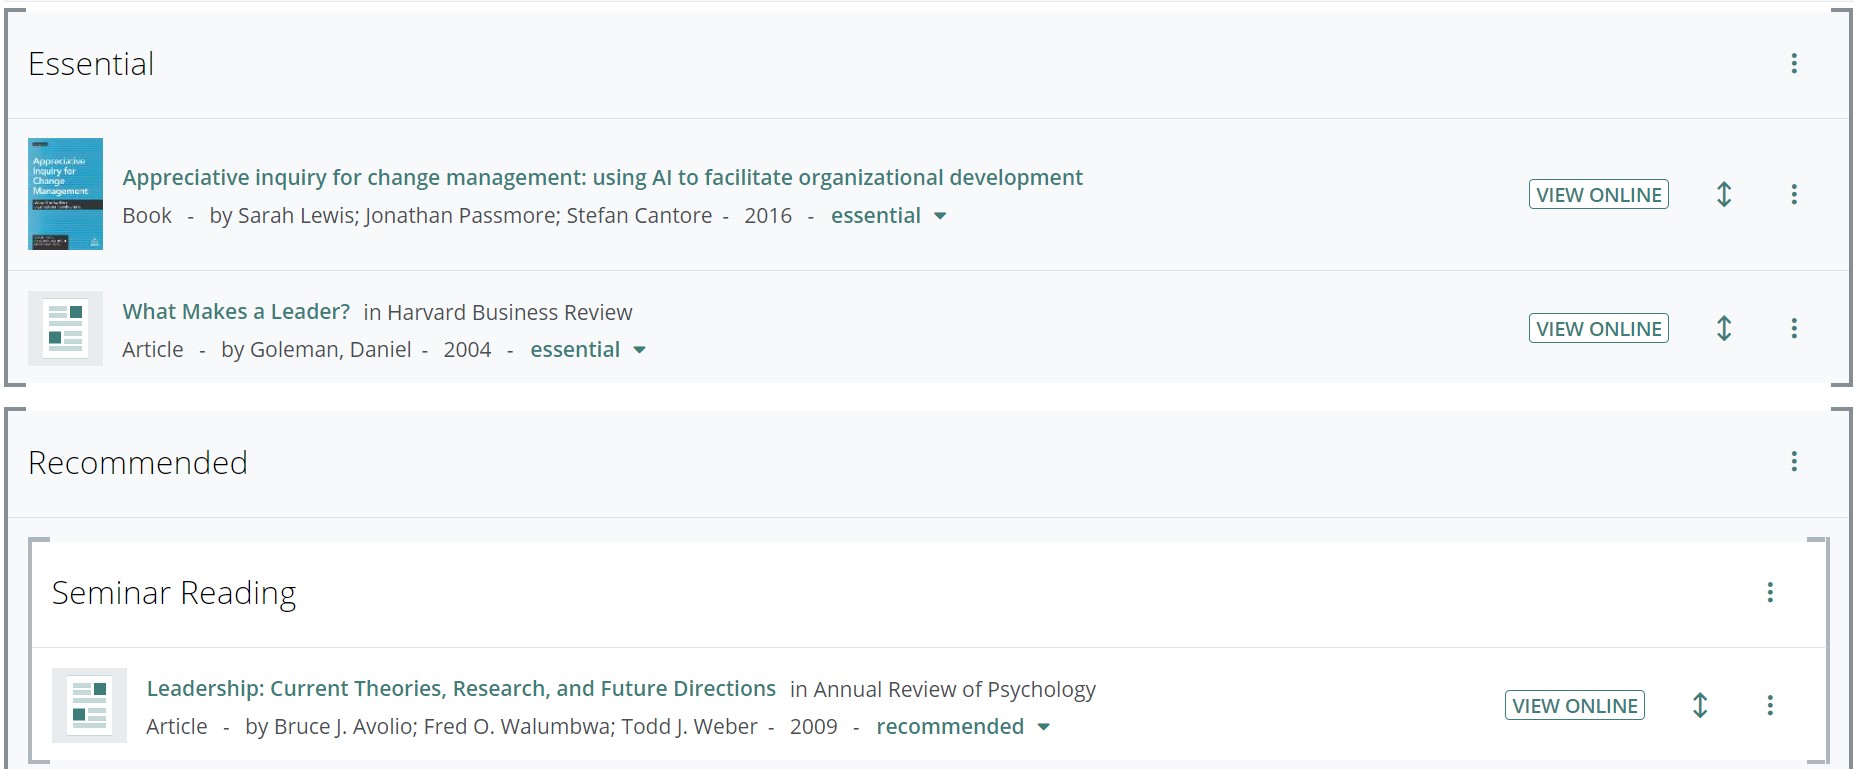
Example of list structured by importance:
Add a paragraph to your Reading List
- If you wish to add a paragraph on your reading list, hover the cursor where you want to add it, in order for the action line to appear, then click Add paragraph.
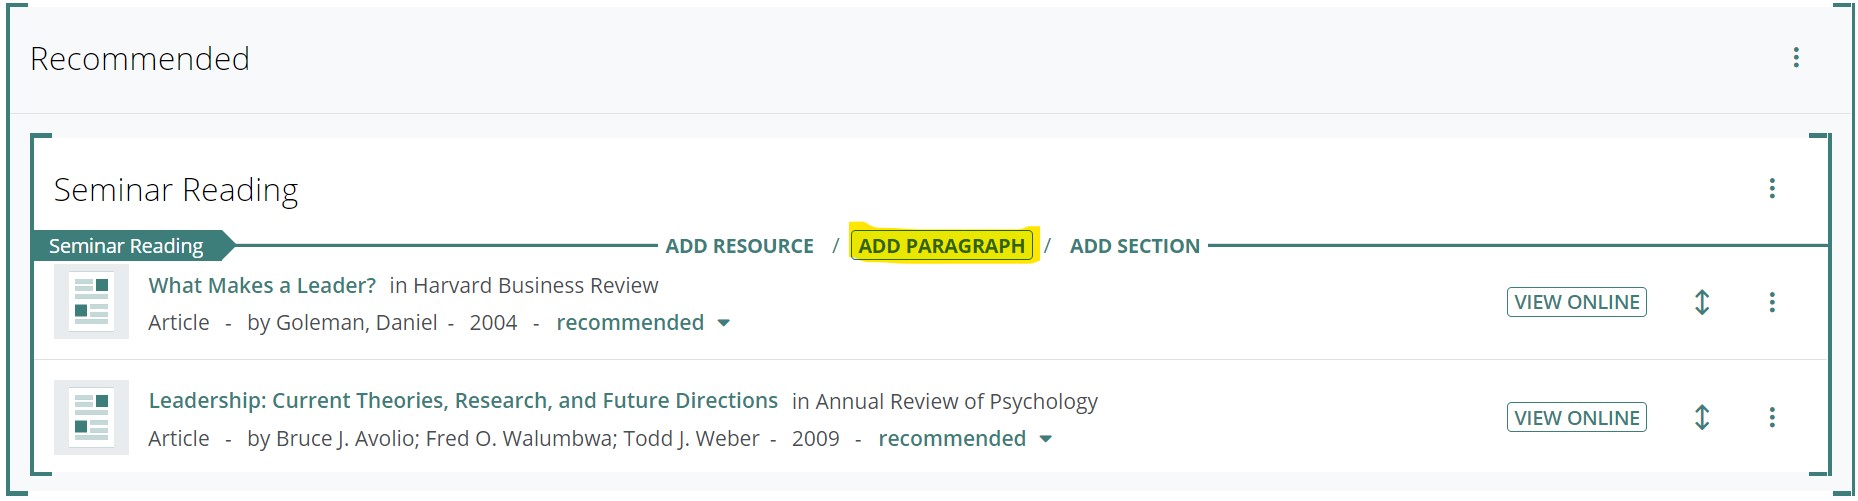
- Add your text, change font preferences if you wish, then click Save. Paragraphs must contain fewer than 2000 characters.

- Add your text, change font preferences if you wish, then click Save. Paragraphs must contain fewer than 2000 characters.
Help and advice
If you need further help with Talis Aspire Reading Lists or wish to arrange a training session for staff in your department please contact your Academic Support Librarian, or email readinglists dot library at warwick dot ac dot uk To request this guide in an alternative format please also email us.
Save bookmarks
Using the bookmark button you can easily collect and save different items to add your reading list.
This video will teach you how to bookmark resources. You will need to have installed the bookmarking tool, as instructed in the first video.
The best place to bookmark resources is from the Library catalogue. First, search for the resource you want to add. It's always a good idea to search for the title and author last name to ensure that you're finding the right resource.
Click the resource title to load the catalogue entry. Then click your bookmarking button. The page will change to show the bookmarks' metadata. You should not need to change any of this when you're bookmarking a single item from the catalogue. Doing so may risk TALIS not being able to link to the library catalogue.
Click 'Create' to save the bookmark. You will be returned to the catalogue page. The process of bookmarking from the catalogue is identical for both print and ebooks. Once you have found the resource that you want to bookmark, click the catalogue entry and click 'Add to My Bookmarks'.
When bookmarking an ebook, you should check that there is a web address online resource link at the bottom of the bookmark metadata and that the 'Online Resource' is ticked. If it is not, click to tick it and click 'OK' and finally click 'Create'.
If you have a resource that is available in the Library as both a print book and an ebook, you can add both of these to a single bookmark. First, search for the resource in the catalogue. Click the resource title for the ebook, scroll down to the bottom of the page, until you find the persistent link, right click that link and copy the URL. Then, return to your search by clicking back.
Now, click the resource title of the print book and click your bookmarking tool to bring up the bookmark metadata. Next to the online resource tick box, use the drop down menu to select 'web address' and click 'Add'. Paste the URL of the persistent link into the new web address box. Now click the 'Online Resource' tick box and click 'OK' and finally click 'Create'.
To bookmark an article from the Library catalogue, select the 'Articles' tab and search for your article. Click the 'Check Warwick WebBridge' button and select the article source from the menu. Use your bookmarking tool to load the metadata. You should check that the 'Resource Type' is set to 'Article'.
For the article metadata, you will want to check that the issue and volume fields are accurately filled out as well as the title and author. If any of these fields are missing, you can add them using the drop down menu and the 'Add' button. To remove a field, click 'Remove'.
Articles should automatically create a second tab titled 'As Part of Journal'. This contains the metadata for the journal. Click 'Create' to save your bookmark.
You can also bookmark websites. Load the site you want to add. Then use your bookmarking tool. The 'Resource Type' should be 'webpage'. You can edit the title field to more accurately reflect the title. It is also a good idea to add the author and add the website name in the publisher field.
You can also use website bookmarking to bookmark a title that we do not have in the Library, if you would like us to try and purchase it. You can bookmark from the publisher's website, from online booksellers, or from Google Books. Just make sure that your metadata includes as much information as possible. Finally, click 'Create' to save your bookmark.
If you cannot find the resource you need online, you can create a manual bookmark. From the TALIS main page, go to 'My Bookmarks', click 'Add', and 'Add Manually'. You'll need to add each piece of metadata yourself as shown in this example. Include as much information as you can, for example, edition or publisher. Click 'Create' to save your bookmark.
This guide will show you how to add your bookmarks to your reading list. Any changes you make will be automatically saved, though the changes will not be visible to students until the next time the list is published.
Once your reading list is set up, you are ready to add bookmarks. You can collect a range of items from Library Search, online databases, publisher sites and around the web using the Bookmark Button. Here are some examples of common material types you may wish to bookmark.
Books and e-books
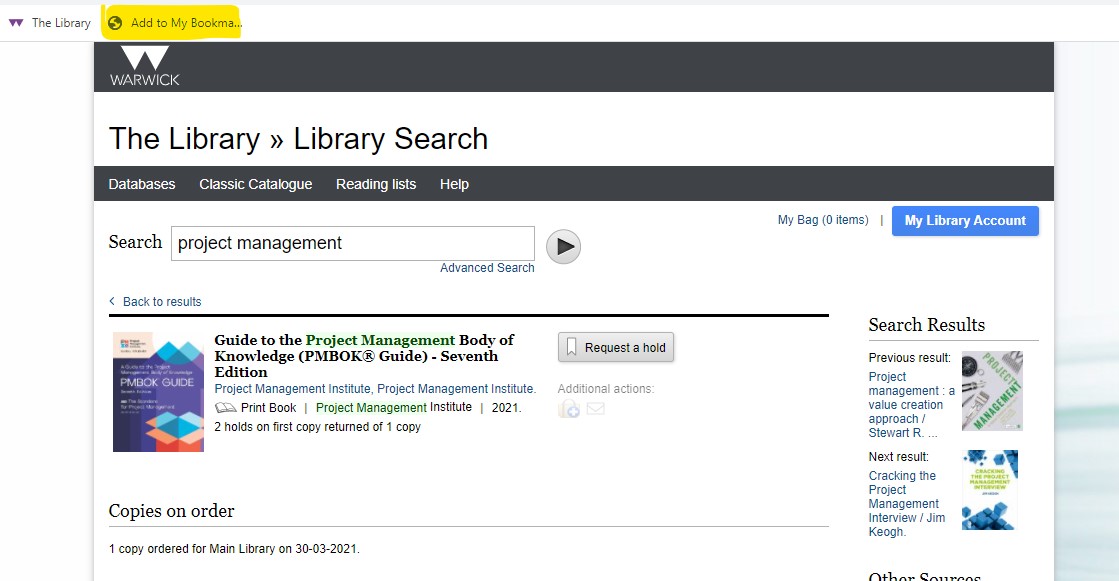
- From Library Search, search for a book you wish to save. i.e., ‘A Guide to the Project Management Body of Knowledge (PMBOK® Guide)’
- Select your title (this will open in a new page)
- Then click on Add to My Bookmarks on your browser’s bookmarks/favourites bar.
- The screen will now split in two, with the Library Search record on the right. The left-hand screen will display all the details of the book you have selected. You may want to review and edit this information. Just type into the boxes or delete, as necessary.
- You can also add more information by selecting the relevant category (author, pages, edition, etc.) in the Add field drop‐down menu.
- To notify your students that both a print book and an eBook are available, start by bookmarking the print book. Then, add a Web address in the Add field drop‐down menu and copy and paste the link to the e‐book. Finally, remember to check the Online Resource tick box.
- You now have two options: click 'Create' and your bookmark will be saved. You can then add it to you list at a later date, or 'Create & Add to List' to save the bookmark and add it to your chosen list.
-
- Option 1: Create Bookmark Click on the Create button at the bottom left of the screen. The bookmark will be saved until you decide to include it in a reading list
- Option 2: Create Bookmark & Add to List
- Click on the Create & Add to List button at the bottom left of the screen. A pop‐up window will appear offering several editing options.
- Choose your Reading List from the Add to List drop‐down menu.
- Select where in the List you want the bookmark to appear.
- Note for student: this can include advice on which chapter or page they should read.
- Importance: it is helpful for both students and the Library if you set reading importance. This gives clear guidance to the student but also helps the Library with their acquisition process.
- Note for library: this can be used to give the Library instructions. For example, if you would like a chapter scanning you can make a note of it here.
- Click OK to save your bookmark to your Reading List.

E‐journal articles available in the Library
- From Library Search, search for the journal you wish to save. i.e. If you wish to save: ‘Youker, Robert (2012) The Job of the Project Manager, Project Management World Today, Vol. 14 Issue 3, Special section p1-11. 11p’ search the journal title ‘Project Management World Today’.
- Select the full text link that covers the year required (this will open in a new page)

- Choose the journal issue required and select the title of the article you are interested in to open the correct page. Click on Add to My Bookmarks on your browser’s bookmarks/favourites bar.
- The screen will now split in two, with the Library Search record on the right. The left-hand screen will display all the details of the journal you have selected. You may want to review and edit this information. Just type into the boxes or delete, as necessary.
- You can also add more information by selecting the relevant category (author, pages, edition, etc.) in the Add field drop‐down menu
-
- Please note there is a separate tab for the journal title under ‘Is part of a Journal’ tab.

- Please note there is a separate tab for the journal title under ‘Is part of a Journal’ tab.
- You now have two options: click 'Create' and your bookmark will be saved. You can then then add it to you list at a later date or 'Create & Add to List' to save the bookmark and add it to your chosen list. (follow instructions for 7. Option 1 or 2 in ‘Books and eBooks available in the Library’ above).
Books and e‐books not available in the Library
If the Library does not have the book you require, you can bookmark it from a publisher’s catalogue, another Library, Amazon or Blackwells etc. and follow steps 2 to 6 described in ‘Books and e-books available in the Library’ above.
Please remember to set the importance of your chosen title and leave a note for students and the library if necessary.
Journal articles not available in the Library
If the Library does not have the journal article you require, you can bookmark it from a database or journal or publisher website and follow the steps 3 to 6 described in bookmarking ‘E‐journal articles available in the Library’ above.
Please remember to set the importance of your chosen title and leave a note for students and the library if necessary.
Websites
You can bookmark from news articles, videos and even websites by following steps 2 to 6 described in the section ‘Books and e-books available in the Library’ above.
Please ensure that you have filled in all the necessary fields such as: 'Add a Web address' in the 'Add field' drop‐down menu and check the 'Online Resource tick box'. Finally, set the importance of your chosen title and leave a note for students and the library if necessary.
Help and advice
If you need further help with Talis Aspire Reading Lists or wish to arrange a training session for staff in your department please contact your Academic Support Librarian, or email readinglists dot library at warwick dot ac dot uk. To request this guide in an alternative format please also email us.
Edit and publish
See how to add bookmarks to your list, set reading importance and make notes for students and the Library.
In this video, I will be showing you how to add items to your reading list, how to edit the list, and how to publish your changes.
In an empty list, you will have the option to add a resource, a paragraph, or section. Once you have an item or section in place, the same options can be accessed on the action bar by hovering over the gaps between items or sections.
Sections are the structure of your list. You can have sections for individual weeks readings, for topics or any other structure you prefer. To add your first section, click the 'Add Section' link. You'll be prompted to add a title and optional description. To add the section, click save. To add subsequent sections, hover below the section or over the gap between sections and click 'Add Section' on the action bar.
You can add a new section within an existing section. To do this, hover the mouse where you would like to add the section. If you are adding within an existing section, the action bar will have the existing section title on the left. If the bar has no title, you are creating a new section that is outside all existing sections.
You can view the structure of your list that you've created using sections by clicking on the 'Table of Contents' link at the top of the page.
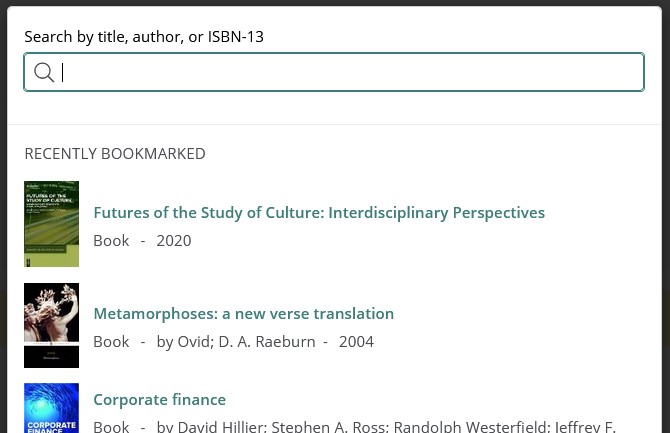
To add one of your bookmarks, you use the same process as adding a section, but you use the add resource link. The menu will show items that you have recently bookmarked and you can search within your bookmarks using the menu bar at the top. This search will also show results from the library catalogue, but we recommend only using resources you have already bookmarked. This ensures that you are adding the correct item. Click the 'Resource Title' to add the resource to your list.
If you have been unable to bookmark an item, you can manually add it to your list. Click the 'Add Resource' link and then click the 'Create Manually' link at the bottom of the menu. This will load the 'manually add a bookmark' page which allows you to create the metadata for your bookmark. This is similar to how you can edit the metadata when creating a bookmark using the bookmarking tool. For more information on this, see our video on bookmarking.
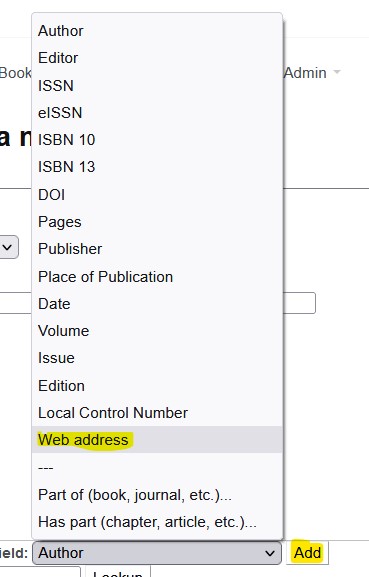
The Resource Type and Resource Title are required fields. You can create more fields using the 'Add Field' drop down. For example, you can add a web link by selecting the web address option, clicking 'Add' and filling in the newly created field with the link.
If you are creating a bookmark in order to request that the Library purchase a book, then please include as much information as possible. Useful information for this purpose includes, author, year of publication, ISBN, and edition. To finish the bookmark, click 'Create'. This will take you back to your list and you can then add the bookmark as normal by clicking 'Add Resource'. It should be the first to appear in your menu.
You will need to set the importance of your resources. This allows students to prioritise their reading and helps the Library know how many copies there should be in stock. Click 'Importance Not Set' on the item and select the importance from the drop down.
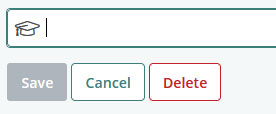
You can also add notes to the resource. Click the three dots to the right of the resource heading and select either 'Note for Students' or 'Note for Library'. Notes for students are indicated by the mortarboard icon and are visible to anyone viewing the list. They are useful for highlighting chapter readings or important sections or anything else you would like students to know. To complete the note, click 'Save'.
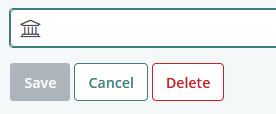
Notes for Library are only visible to academics and to Library staff and areindicated by this classical temple icon. They can be used to request chapter scans, ask for ebook or extra print copies, or specify that copies should be moved to a certain section of the Library. If you are requesting a scan, please include the chapter number and title and, if possible, the page range. Library staff may also use this section to record actions taken or messages to academics.
You can move items within your list by clicking and dragging the double arrow icon next to the item. You can move items within the list by clicking and dragging the double arrow icon next to the item. You can move an item within a section or between sections.
Changes to your list will be automatically saved as a draft. These changes will not be visible to students until they have been published. When you make changes to the list, Talis will insert a yellow bar at the top of the list, alerting you that you have unpublished changes.
To publish these changes, click the 'Publish' button to the right of the yellow bar. The bar will disappear, and the current version of the list will now be visible to students. The Library will be automatically alerted that the list is available to review and we will check and process the list.
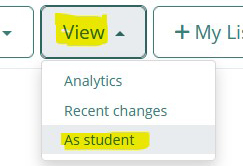
Finally, to view the list as your students will see it, click the 'View' drop-down and select 'As Student'.
Thank you for watching, if you have any questions, queries or concerns contact readinglists dot library at warwick dot ac dot uk
This guide will show you how to add resources to your list after you have bookmarked them. Any changes you make will be automatically saved, though the changes will not be visible to students until the next time the list is published.
Add a bookmark
- You can add your bookmarked resources to your list similarly to how you would add a new section (see our set up guide and video above on how to structure your list). Click the ‘Add resource’ link on the Action Bar, or in an empty section.


- This will open a menu showing items that you have recently bookmarked, and you can search within your bookmarks using the menu bar at the top.
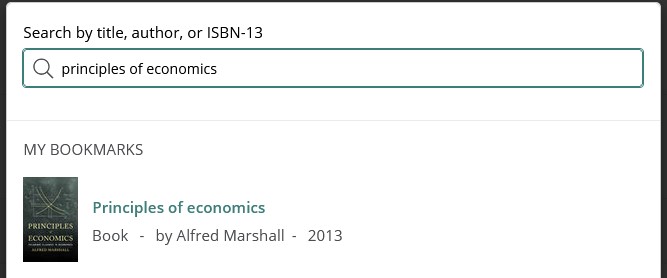
This search will also show results from the library catalogue, but we recommend only adding resources you have already bookmarked. This ensures that you are adding the correct item.
- Click the title to add the resource to your list.

Manual items
If you have been unable to bookmark a resource, you can manually add it to your list.
- Click the ‘Add resource’ link on the Action Bar, and then click the ‘Create manually’ link at the bottom of the menu.

This will load the ‘Manually add a bookmark page’, which allows you to create the metadata for your bookmark.
- This is similar to how you can edit the metadata when creating a bookmark using the bookmarking tool. For more information on this, see our video and guide above on how to bookmark.
- The resource type and resource title are required fields.
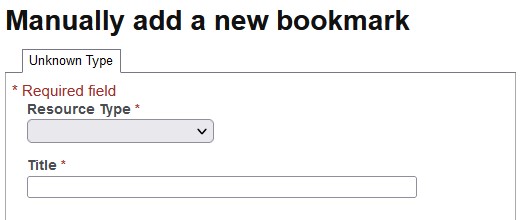
- You can create more fields using the ‘Add field’ dropdown

For example, you can add a Web link by selecting the ‘Web address’ option, clicking ‘Add’, and filling in the newly created field with the link
- If you are creating the bookmark in order to request that the library purchase the book, then please include as much information as possible. Useful information for this purpose includes Author, Year of Publication, ISBN, and Edition.
- To finish the bookmark, click ‘Create’. This will take you back to your list, and you can then add the bookmark as normal by clicking Add resource. It should be the first to appear in your menu.
Setting importance
Once you have added a resource, you will need to set its Importance. This allows students to prioritise their reading, and helps the library know how many copies there should be in stock.
Click ‘Importance not set’ on the item and select the Importance from the dropdown [Select ‘Essential’].

For more information on how the Library uses importance to determine purchasing for your department, please contact your ASL.
Add notes
You can also add notes to the resource, to provide reading guidance to students, or instructions to the library.
- Click the three dots to the right of the resource heading, and select either 'Note for Students', or 'Note for Library'.
- Student notes are indicated by the mortarboard icon, and are visible to anyone viewing the list
- They are useful for highlighting chapter readings or important sections, or anything else you would like students to know
- Notes for the library are only visible to academics and to library staff. They are indicated by the classical temple icon
- They can be used to request chapter scans, ask for ebook or extra print copies, or specify that copies should be moved to a certain section of the library
- If you are requesting a scan, please include the Chapter number and title, and if possible the page range. Please be aware that the library is not able to Library staff may also use Library Notes to record actions taken or messages to academics. In particular, we will use it to indicate if an ebook was unavailable for us to purchase
Move items
There are multiple ways you can move items and sections within a list.
Drag and drop
To move a single item, the easiest way is to click and drag the double arrow icon next to the resource. This can only be used on a single resource at a time, and cannot be used for a whole section. 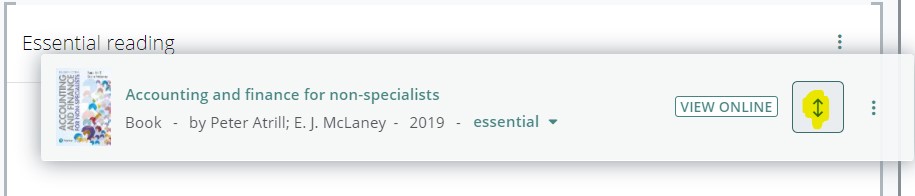
You can move a resource within a section, or between sections.
Cut and paste
- Click the three-dotted button next to the object you're wanting to move, then select Cut.
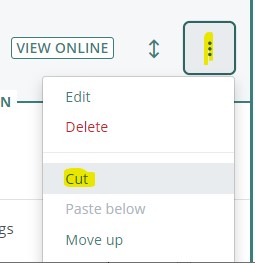
This can be used on individual resource, or on an entire section.
The item you have cut becomes greyed out, and the action bar’s normal options are replaced with 'Paste' and 'Cancel'.
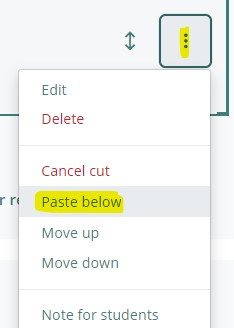
- To paste the item or section in the list, navigate to where you would like to place it, make sure the Action Bar is located where you would like the item to be on the list, and click 'Paste'.

Alternatively, you can click the three dots on any item in the list, and select 'Paste below' to insert your selection immediately below the item you have clicked on.
Please note that the Cut and Paste function can only be used to move an item or section within the same list, and cannot be used to cut something from one list and paste it into another.
Help and advice
If you need further help with Talis Aspire Reading Lists or wish to arrange a training session for staff in your department please contact your Academic Support Librarian, or email readinglists dot library at warwick dot ac dot uk To request this guide in an alternative format please also email us.
When your list is complete, publishing it will make it visible to students and enable the Library to review it.
When you make changes to the list, Talis will insert a yellow bar at the top of the list, alerting you that you have Unpublished changes.

To publish the changes, click the ‘Publish’ button to the right of the yellow bar. The bar will disappear, and the current version of the list will now be visible to students.
The Library will be automatically alerted that the list is available to review, and we will check and process the list. Before publishing, please make sure that:
- Every item has a reading Importance (or is in a Section that makes the Importance clear)
- The list has a module code attached
- The list shows the expected student numbers. This can be an estimate, and can be changed later
View as student
To view the list as your students will see it, click the 'View' dropdown and select ‘As Student’. You will need to have published your list at least once before this option is available.
Help and advice
If you need further help with Talis Aspire Reading Lists or wish to arrange a training session for staff in your department please contact your Academic Support Librarian, or email readinglists dot library at warwick dot ac dot uk To request this guide in an alternative format please also email us.