Inserting a table
-
From your Bibliography page, access the Sitebuilder edit window, as shown in the 'Create a simple bibliography' step. Delete anything currently there, making sure to copy any important text into notepad or a Word file.
-
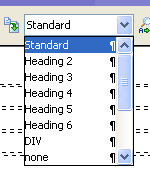
Before we insert the first table, you might like to enter a category name on the first line. To make it stand out, highlight the text, then choose 'heading 6' from the drop down menu:

-
You are going to create the first table in your Bibliography. Click on the 'insert table' button
 - this will bring up the 'Table Properties...' dialogue. Choose an appropriate number for the rows and columns, bearing in mind that you can always add or delete rows and columns later. Then, click 'OK'.
 -
You now have a table - begin by entering headings in the first row. To make them bold, highlight the text, then click on the 'bold' button
 . You can now proceed to enter details of your books in the next rows - your table should now look something like this:

-
To add more rows, click in the bottom row of the table. Then, press the right mouse button, move down to 'Table', then choose 'Insert row'. You can insert a row in the middle of the table - just click in the appropriate row first. You can delete rows, or add and delete columns in the same manner.
-
Repeat this process for each category you want to add to your bibliography.
